Mod Shop: Upgrading Your Tuners
I’ve told you a little about my Lab Rat bass and showed you some of what I’ve done to it so far. The Lab Rat was a brand-new SX Ursa 4 that I paid about $150 plus shipping, and I bought it for the specific purpose of experimentation. I had a pickup configuration in mind that I wanted to try out, which is complete and working quite well for me. I also wanted to test an idea for a tone block in the body, which is yet to be done. I had plans to build my own body, but I like the color and body shape and the whole bass cost roughly what I had budgeted for a body and neck. Besides that, the body is alder, the neck joint is tight and solid and the neck is stable, making it a very suitable platform for the kind of experimentation I had in mind.
Original Tuners
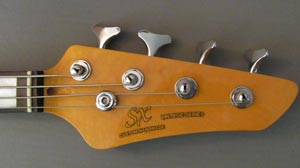 The electronics and hardware, however, were exactly what you’d expect to find on a $150 bass. That brings us to today’s project of replacing the tuners.
These ones are copies of the Gotoh brand. They’re hard to tune, don’t stay in tune for long, and they rattle a lot. I could replace these with real Gotohs and the swap would be easy: I’d have a solid, high quality tuner and I probably wouldn’t have to drill the headstock at all to put them on. However, I prefer the look of the Fender style elephant ears, so I’m going with a set of Schallers. Schaller and the Gotoh are both top-shelf brands and the price reflects that, but you can upgrade with brand new tuners for anywhere from $35 for a good quality standard 4-string set on up into the hundreds of dollars for better quality, bigger sets (5 or more strings) or drop tuning options. I really wanted a drop D tuner so I went ahead and got a Hipshot Extender Key, which replaces the E string tuner on a 4 string bass. Yes, the Schallers still come in a set of four, so if you get an extender key, you’ll have an extra, brand new tuner. The total cost of parts for my upgrade was just under $140 plus shipping.
Removing the Tuners
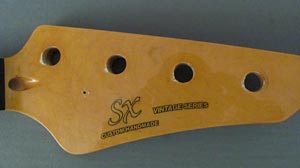 Ok, it’s time to get busy. If you’re going to do a tuner swap, and you buy tuners that fit the same size peg holes already in your headstock, it could be as easy as removing the old tuners and mounting the new ones. This one’s not quite that easy, but the first step is the same: remove the old hardware. You can see that the peg holes here are chipped around the edges, which happened during manufacturing. It’s no big deal as long as the chips aren’t visible after installing the tuner nut or bushing, but if the chip is too big, the tuner won’t hide it. I have to drill these out to fit a Fender-style, press-fit tuner bushing and I’ll show you how to avoid wrecking your headstock in the process.
After taking some measurements, I discovered that the hole spacing is not consistent, not to mention they’re not in a straight line. This could create issues, so next you have to look at how the new tuners will fit.
Checking the Layout
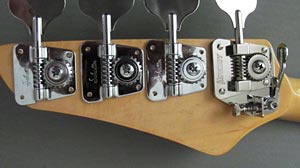 In this case, you need to drill for the bushings, but the new tuner posts themselves should fit through the existing holes. Even if you’ve taken some measurements before you bought your new tuners to make sure they’ll work, this is a good time to drop them in and get a real picture of what you’re dealing with. You can see here that the bottom corner of the G string tuner plate sticks out past the edge of the headstock but the screw hole lands on wood. It’s not so close to the edge that it will break out, so it can still work. You can also see that the A and D string tuner plates are closer together than they are to the other tuners. This is due to the uneven hole spacing. These issues won’t hinder the operation of the tuners and are purely cosmetic.
Here you could grind the corner of that protruding plate to match the contour of the headstock, or you could fix the hole placement problem (which is quite involved and time consuming). I’m not going to do either of those things, because I don’t like the shape of this headstock and I’m not even sure I’ll be keeping this neck long-term. If this neck stays straight and remains as stable as it is, I’ll probably keep it. If I keep it l’ll be changing the shape of the headstock for sure and, at that point, I’ll plug the peg holes with maple and drill new ones in the right places. I’m not going to lie, those uneven tuners are going to bother me, but they work. Sometimes, when you run into issues like this, you have to weigh the pros and cons and decide how far you want to go.
Bushings
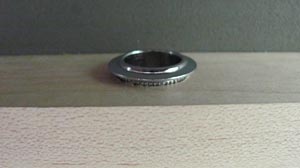 Now, it’s time to make some preparations and drill some big holes. The specs for this bushing call for an 11/16” hole but you want to be sure the specs are right. Once you take the wood out, it’s hard to put back. If you don’t have a small piece of maple on hand, you can run down to the home improvement store and get a 1”x2” for a couple of dollars. You’re going to need less than a foot, but the smallest piece my local place had was 2’ and it cost $3.
Drill a hole to the size that the specs call for in a test piece and check it for fit. These bushings are tapered, so as you put it in it should start easily and then get snug. If it doesn’t go in at all or goes in more than half way before it snugs up, then you need to try a different size hole. In this case, 11/16” is right on. I didn’t press this bushing all the way in for the test fit because I wanted to be able to take it back out without any trouble.
Jig
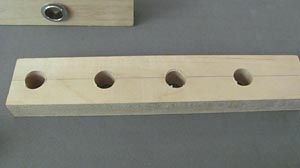 Now you’re going to figure out what size the existing holes are in the headstock. In my case, they were 9/16”. You’re going to make a sort of jig by drilling four holes, the same size as your existing peg holes, through another maple piece. Use a ruler to lay it out. Get them in a straight line and get the spacing as close as you can to the headstock spacing. You can do this whole project with a hand drill if that’s what you have available. Manhandling a drill bit that big in hard maple is tricky, but it can be done. I would also recommend getting an attachment for your drill that will hold the drill square to the piece you’re drilling. There are a couple different varieties available at your local hardware store and they don’t cost all that much. If you have access to a drill press, use that. It’s a lot easier on your hands and there’s less of a chance that your drill bit will wander, causing inaccurate hole size or deformed holes.
Preparation
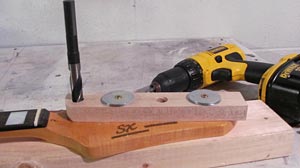 Now that you have your jig ready, lay the neck on a piece of two-by-four wood. Make sure the two-by-four is at least the full length of the neck so the neck heel rests on the other end. This will help the stability of your set up. Then, lay your jig over the headstock, decide which headstock hole you’re going to drill out first and use the bit you drilled the jig with to line it up with the headstock. Just drop the drill bit in and make sure it’s through both the jig and the headstock and resting on the two-by-four. Clamp the whole thing together by putting deck screws with large washers on them through two of the remaining holes and screw them into the two-by-four. After you tighten the screws down, make sure nothing shifted by turning the drill bit counter clockwise as you look at it from the top. If it turns without too much resistance, the holes are still lined up and it’s ready to drill.
Drilling
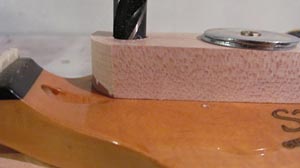 Make sure the jig sits down nice and flat on your headstock with no gaps. In this case, I had to sand a little bit off the jig to clear the “ramp” going toward the nut. This jig serves two purposes. First, as you start to drill, the bit will bounce around in the hole and gouge it up. This is called chatter. Then, as you drill deeper, it will smooth out and center it’s self in the hole. By the time the drill reaches the headstock, it will be cutting cleanly and will be centered in the existing hole. Second, having this jig clamped down to the headstock will prevent wood from chipping up from the top edge of the hole. Nice and clean.
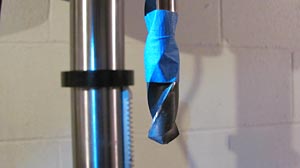 With the 11/16” bit in the press, I’m ready to drill. I’m only going to drill as deep as needed to install the bushing. You can drill the hole out to bushing size all the way through the headstock if you want to. It won’t have any affect on the way your tuner operates. I just have a general rule of thumb that I don’t take out more material than I need to. If you’re doing this with a hand drill and don’t want to go all the way through your headstock, just figure out how deep you need to go and mark your drill bit. Measure the portion of the bushing that goes into the hole plus 1/16”, then add that to the thickness of your jig. Take that measurement and mark your drill bit. Measure the bit not from the point, but from where the taper of the point meets the full diameter of the bit.
Finished Single
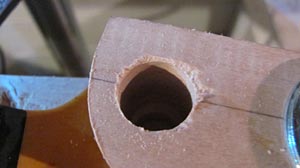 Now make your cut, either all the way through the headstock or to the depth you have marked on your bit. Take a look at the top edge of the hole in this jig. This is why we went to all the trouble of making it and putting it on there. The hole in the headstock will be clean. Take the clamp screws out and repeat the jig alignment and clamping process for the other 3 holes, moving the clamp screws to vacant holes each time.
More Drilling
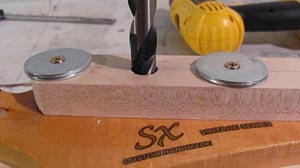 Here, you can see that I’ve just moved one of the screws over to the hole I already finished and, with the screws loose, used the same hole alignment method. Then tighten everything down and drill.
When all the peg holes are finished, you can set the bushings. There are a few different ways to do this, and even special tools you can buy for this purpose.
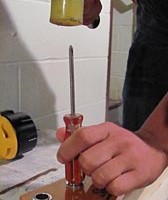 I use a screwdriver and a soft hammer. Use whatever works but keep these things in mind. You want even pressure around the rim of the bushing so something domed that will “nest” inside it works best. You also want to use something soft enough not to damage the bushing or the finish on it. The end of a plastic screwdriver handle works great but don’t hit the tip of a screwdriver with a steel hammer: hardened steel is brittle and the pieces that fly when it breaks are sharp.
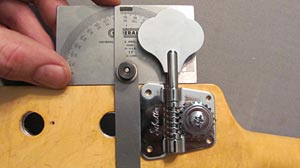 With the bushings set, you can lay out the pilot holes for the plate screws. I use this protractor to get the tuner lined up and then mark the screw holes with a sharpie.
The small hole to the right of the peg hole is from the original hardware. The black dots are the new hole locations.
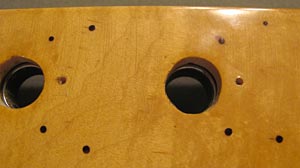 Time to drill some pilots. Find the size you need and you should be able to put it far enough in the drill chuck to set the depth you need. You don’t want to accidentally go all the way through. Start with a bit just slightly smaller than the outside diameter of the screw threads and use a test piece of maple to make sure it works.
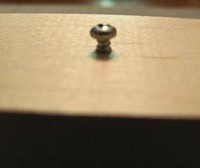 Maple is very hard and these screws are very small. If you don’t drill the pilot big enough, you can easily twist the head right off the screw trying to put it in. If you drill it too big, the screw won’t get enough bite and you won’t be able to tighten it. Better to find out on a scrap piece of maple. Taking a broken screw out of a headstock makes a mess.
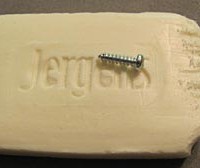 When I’m putting screws into any kind of hard wood, I always scrape a bar of soap with the screw first. This lubricates the threads, making it much easier to drive and unscented bar soap will not break the wood down.
With the right size pilot and some soap, that screw will go in nice and it’ll stay there until you take it out.
Installing the Hipshot
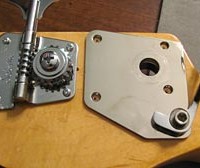 With the standard tuners, it’s just a matter of screwing the plates to the headstock and you’re done. The Hipshot is a little trickier and has to be disassembled to get access to the mounting holes. You just remove the big screw from the back of the gear and everything comes off the plate. Just don’t forget how it all goes back together.
Screw the plate down, put the tuner back together and you’re ready for strings.
Relocate the String Tree
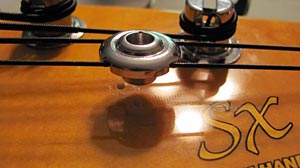 The only thing I had left to do was to relocate the string tree. The diameter of the posts on the new tuners is so much bigger than the old ones, the strings are at a different angle from nut to tuner. If you run into this too, just rest the tree in the strings and mark it’s new location by putting a nail through the screw hole and give it a light tap with a hammer. It should be close enough to the original hole that the tree will cover it.
Done!
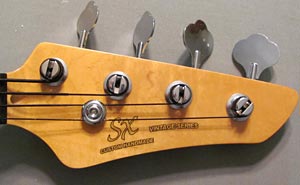 Here she is, all decked out in new hardware. I’ve had some time to play it since I put the tuners on, and I got all the results I had hoped for. As expected, it’s easier to tune up and to hold it’s tune better. Here’s the part I didn’t expect: I got a noticeable improvement in tone as well. I guess it makes sense since the tuners provide better metal, more mass, and more solid contact from string to headstock. The result is more noticeable than I suspected, and I’m very pleased. It is a little neck heavy now, which I’m not crazy about, and leads to the next project of putting in a tone block to get some weight in the back end.



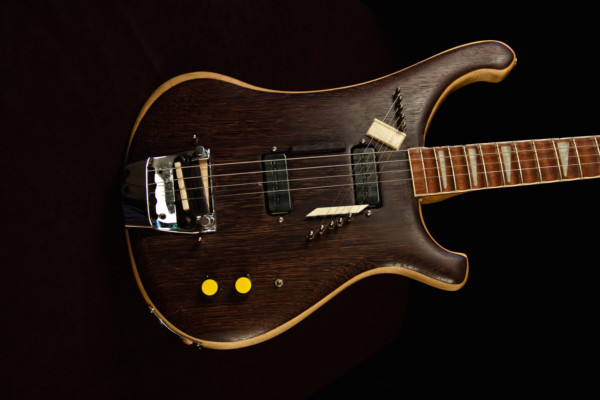
Changed the tuners in my Squire 50’s Classic Vibe P-bass as my second project. Took a bit of time, but it was well worth it! Great instructions, Rob!
This is a bit silly. Why throw those huge tuners on a headstock like that when you can put on a set of Hipshot Ultralite tuners that don’t need that huge wasteful metal mount (with cloverleaf keys), are lighter, and actually fit the headstock properly? I bet that bass is going to neck-dive like a kid bobbing for apples at a carnival.
For your tl;dr pleasure:
3rd paragraph – “I could replace these with real Gotohs… However, I prefer the look of the Fender style elephant ears…”
Last sentence – “It is a little neck heavy now, which I’m not crazy about, and leads to the next project of putting in a tone block to get some weight in the back end.”
Plus, you can get the ultralites with the clover leaf keys. I agree, this was a misguided mod, but it was done well. It’s also usually better to ream the holes larger instead of drilling them, but the drill guide was a good idea.
This is my Ursa 4; I’m not touching a thing on it other than maybe the nut. I have a LOT of fret noise at the first fret on all 4 strings but other than that it plays great, sounds awsome, weighs next to nothing and stays in tune as well as my Rick 4003. This is a great bass right out of the box.
Great article! Thanks man!
Anybody know of any locking tuners for bass?
I can do you one better. ;-)
Sperzel Trim-Lok Bass Tuners
http://www.wammiworld.com/p8205.php
Why would you need locking tuners on a bass? Just stretch your strings after you put them on and they wont go out of tune. My never do unless I bump the tuning keys.
David Schwab – I’ve done that a time or two, myself, so I understand where you’re coming from, but, in my opinion, locking tuners make restringing just a little bit easier (though I strongly disagree with using a locking nut- blech!); with locking tuners, it doesn’t seem as if you have to spend anywhere near as much time getting the strings well-seated on the string posts, giving you more time to focus on more important things… like playing! :-D (no offense. I don’t have locking tuners on any of my gear, but my budget is incredibly low, and I only just ordered my first set of locking tuners a few days ago. (They’re off-brand tuners for my guitar.)
I’ve kind of wondered why people–including myself–still leave the tuner knobs on the instrument while playing, let alone storing it. I mean… when it comes to the drum set, aside from the lugs on some bass drums, it seems like all of the lugs on drums require a tuning key, so why not do the same for a guitar so you, as you just gave a example, don’t “bump the tuning keys”. :-/ By making the tuning keys removable, it seems as if you would allow the tuners of fretted/fretless stringed instruments to be set even closer to each other, allow for headstocks to be shorter, saving on wood (and therefore, prices). Not only that, but then anyone could buy a tuning key that would allow them more precise leverage (and I understand that gear ratio of the tuners is important, but that’s only half of the mechanism, if you know what I mean).
I want you to teach me your ways in person. Lol. I’m reading this and got lost a few times.
Who wrote this article?
Rob Doane wrote it.