Talking Technique: Changing Technique Habits – What it Takes

There is a step by step process that can help you change ingrained habits. It is a fast and effective technique to practice just about anything so effectively that it can become addictive. But it is also a great catalyst for changing ingrained habits. That is good news, because if you have ever tried to change a habit – be it eating better, using better posture, or exercising more – you know that it is surprisingly hard to change.
Here is the thing: if you have been playing for a while and have reached a level of comfort on the instrument, it may go against every grain in your body (and mind!) to change things up, even if you feel that there are limitations to your current technique. So, first, there have to be good and convincing reasons to even want to change. Often it is something similar to any of these problems:
- Maybe there is a lick or line that resists clean execution.
- You cramp up frequently when playing.
- You hit a speed bump you cannot overcome.
- The groove isn’t as tight as you’d like.
- Pain when playing or getting tired quickly.
- The notes sound uneven, sloppy or some are choked.
The next step is to understand precisely what’s going on and to trouble shoot. For example:
- Are random plucking patterns in the right hand leading to speed bumps?
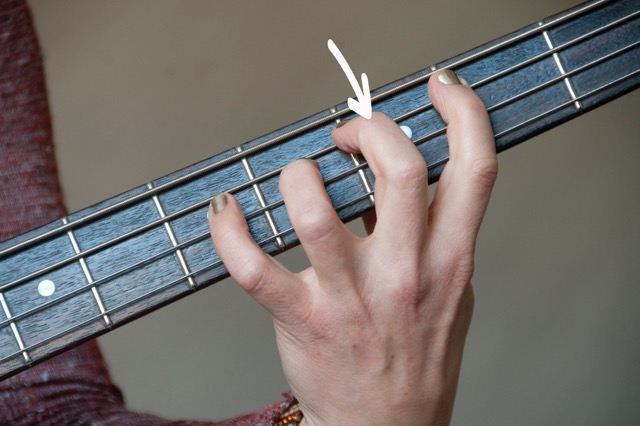
- Are flaring left hand fingers to blame for timing issues?
- Is bad fingering or not using one-finger-per-fret limiting your options?
- Is over gripping the neck with your left thumb causing strain and slowing you down where using the weight of the right arm on the bass as a counter weight could provide relief?
- Are you holding tension that restricts your movement?
- Is an uneven posture causing you to over compensate elsewhere?
- Are you making unnecessary movements that result in bad timing?
What happens at this stage frequently is that we get into the practice room and faithfully tell our fingers to stay down, our shoulder to drop and our thumb to loosen up. And all parts cooperate while we practice. And then that night someone shoots a picture of us on the band stand and that shoulder is right where it used to be, and the thumb is wrapped around that neck twice. What is going on here and how can it be remedied?
What is going on here is that unconscious habits are working against you. But there is a powerful remedy. I call it PORA, short for “Principles of rotating attention”. I first learned about this method studying at the University of Music in Austria. Classical musicians apparently have been using this method for centuries with great results. I adapted it for my purposes back then and the effects have been nothing but mind blowing. PORA doesn’t only help change habits, I find it makes any practice more effective – tunes, licks, grooves what have you.
First, I will tell you briefly how it works. PORA is a four step process and it is very important to follow each step precisely.
Step 1: The Setup:
The set up has two parts:
- Identify a short piece of music (a bar is great or a phrase that gives you trouble; could also be a scale or arpeggio). It’s not so important what it is exactly, this is just the vehicle for the change of technique in this case. It is important that it is short and has a defined length.
- Write down up to four items you want to focus on. This could be a detail about your right hand (alternating plucking or keeping fingers rounded, for example), a detail about your posture (relax shoulders).It could also be focusing on excellent timing (being precisely on the click), or effective fingering. It really is helpful to write those focal points down.
Your list could look something like this:
- RH alternating
- Keep shoulders level
- Play on the click
- One-finger-per-fret positioning, effective and consistent fingering
Step 2: The PORA Process:
Now you play the phrase and put your attention on item 1 (RH hand alternate pluck, for example). While you play this round your timing may be off, the fingering of the left hand may be less than ideal, but your right hand is alternating. Then, right after you play the phrase again, this time with focus on item number two (in our example relax shoulder). Your right hand is off the hook now, but your shoulder is where all your attention goes. Then perfect timing. Then your left hand item. You repeat this process back to back four to five times.
If you do this correctly, you will feel a bit exhausted, like after doing push ups or running around the block.
Step 3: The Evaluation:
This is where you examine your experience with the previous step. Did your mind wander? Which item was the hardest? Did some items get better with subsequent rounds? What were you experiencing? As you ask these questions, be nice to yourself. The purpose here is not to judge yourself harshly. Keep a positive tone, be an impartial observer as much as you can. If it is hard for you to do that without negative voices interfering, then don’t worry about evaluation in that way: just sit and breathe for a few seconds. Realign.
Step 4: The Repetition:
After the evaluation or pause, go back to Step 1. Reaffirm the items you are working on (keep them the same until you get a lot of experience with this). Then follow the steps.
This practice session does not take long at all. You can do five repetitions of this process easily in about five minutes. Then, step away, play a song or just relax. Maybe later that day or the next you have band practice. And all of a sudden you realize – ack, I just had my shoulder by my ear again, didn’t I?
Just like with the evaluation, it is crucial to be nice with yourself. It is actually awesome that you noticed the old habit creeping in. Really, what it means is that an unconscious habit is beginning to enter your consciousness, so congratulate yourself. Fix it in the moment and don’t worry about it. Maybe five minutes later your shoulder popped up again. (Hey cool, I am noticing it even faster now!), adjust, keep on playing.
What will slowly but surely begin to happen is that your brain starts to pay attention to these details from your list. That is due to:
- The intense focus during the PORA practice
- The relaxation involved
- By intensifying your intent your effectiveness goes up.
- Practicing turns into a short meditation;
- The practice is short so it is easy to get started;
- The payoff is pretty motivating
- Goal oriented learning is more effective. By writing the items out and restricting the music to a short piece we get immediate feedback.
- By attaching positive feedback with every observation (hey, I noticed!) you encourage your mind to keep going forward.
All this primes your new habit with every practice session so that the old one starts to suddenly feel uncomfortable.
Got five minutes here and there? Try it! Keep the piece of music short and follow the steps precisely. I created a handy guide, that lists the steps and makes it easy. Print it out and hang it up in your practice room. You can get it here.
Final Tip:
You get an accumulated benefit when you do a few short five minute practice sessions like this spread out over the course of the day.
Austrian-gone-Californian Ariane Cap is a bassist, educator, blogger and author. In her book Music Theory for the Bass Player and corresponding 20-week online course, she teaches music theory, bass technique, bass line creation and fretboard fitness in a systematic, practical and experiential way. She just released a brand new course on ear training for the bass player: Ear Confidence - 6 Paths to Fearless Ears. Contact her via her blog or website.


